High-Performance Epoxy Grout: Installation Techniques and Best Practices
High-strength Epoxy grout application has become increasingly popular in industrial flooring application due to its remarkable capacity to protect the base floor from various impacts. However, it’s efficiency is highly dependent on proper installation methods.
So, before you try grouting in construction, have a read! In this blog, we will discuss installation techniques and best practices for epoxy grouting.
Installation techniques for Epoxy grout
Here is the detailed installation step-by-step guide for epoxy grouting discussed below-
-
Preparation of Substrate
The first step of epoxy grouting is cleaning and preparing the substrate or the surface of the floor. Any adhesive residue or old grout should be properly removed before epoxy grouting.
-
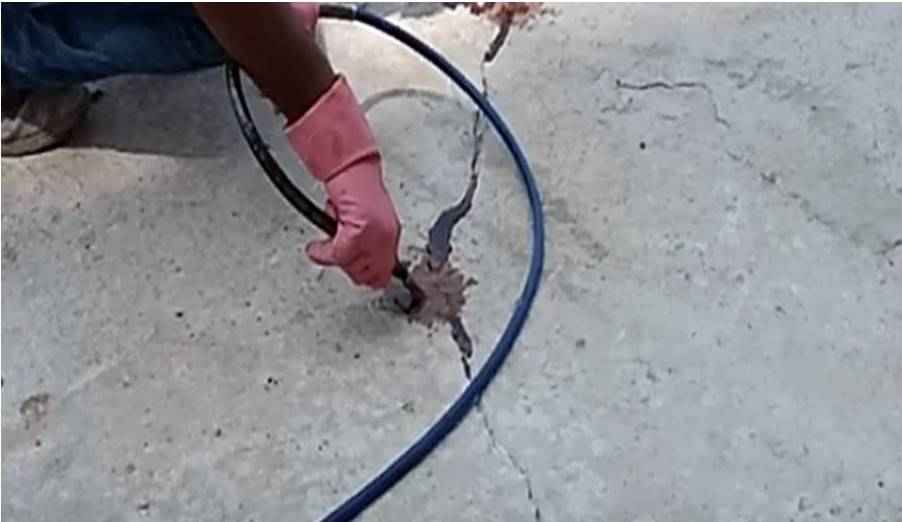
Drilling injection holes
Injection holes of 8 - 10mm dia shall be drilled at fixed intervals along the crack length or in a grid pattern in case of grouting of voids in concrete. The holes shall be cleaned to remove all dust and loose material by blowing compressed air.
-
Fixing nipples
Suitable injection nipples of GI/PVC shall be fixed in these holes using an epoxy sealing putty. The cracks shall also be sealed with this product.
-
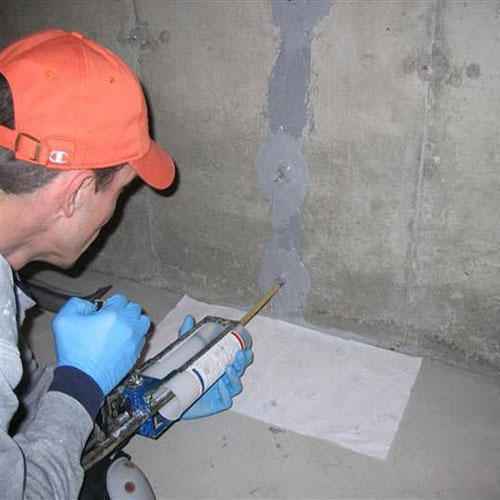
Application of epoxy grout
The two components of EP GROUT LV injection grout shall be individually stirred and then mixed and injected into the nipples through a suitable injection pump exerting a uniform pressure. Injection shall be carried out till it flows from the adjacent nipple and then stopped. The same operation shall be carried out for the next nipple.
After all the holes are completed, the nipples are removed next day and the holes shall be sealed with a high strength mortar removed immediately with a resin removing cream, followed by soap and water. Solvent should not be used. In case of contact with eyes, immediate rinsing with plenty of clean water is suggested and medical attention shall be sought immediately- Vomiting should not be induced.
-
Curing and Drying Time
After this, the epoxy grout will take some time to completely cure and dry. If you hire a professional for epoxy grouting, you can ask them how much drying time the mixture will take and plan accordingly.
-
Post-Installation Care
Post-installation care is crucial to ensure the durability and high-performance of epoxy grouting in construction. Always adhere to manufacturer or installer’s instructions to maintain the appearance and longevity of your epoxy grouting.
Best practices for epoxy grouting
There are several best practices you can consider while installing epoxy grout for higher efficiency-
-
Installation by professionals
The best way to install epoxy grout like EP Grout LV for tiled surface or cracked surface is to take professional help who have expertise and experience.
-
Focusing on small sections
It is always good to start with smaller sections to ensure consistent application across the surface.
-
Using right tools
Epoxy grouting requires special tools. And only professionals can offer you durable grout solutions in India with the right tools and techniques.
-
Regular cleaning
After installation, epoxy grout surfaces should be regularly cleaned for longevity.
Conclusion Using epoxy grouting can be highly beneficial in strengthening your floors and enhancing their lifespan. Above, we have discussed some key steps and best practices for epoxy grout installation. Also, at Firstchoice Speciality Chemicals, you can get most Durable Grout Solutions in India.